
Open any FPV parts list, and FC, ESC, 4-in-1, ELRS, VTX... the screen is full of abbreviations that look like a foreign language. But these things are actually not complicated-it's just six components doing six things, and each will ultimately be reflected in the flight feel through your sticks.
This article integrates multiple latest 2026 guides to help you break down and explain every part, every wire, and every setting of an FPV drone. More importantly-before spending a single cent, figure out exactly what these things are for.
1. What exactly is FPV?
FPV (First Person View) drones let you sit in the cockpit. You are not standing on the ground watching the drone fly, but wearing goggles to watch the real-time footage through the camera on the drone.
Unlike consumer aerial drones like the DJI Mavic-which automatically hover and avoid obstacles-FPV drones are fully manual. There is no GPS stabilization, no altitude hold, and no obstacle avoidance system. You control everything: throttle, pitch, roll, and yaw. This means complete creative freedom, but it also means you must pay the price of practice.

2. Six core components, disassembled one by one.
Imagine an FPV drone as a living organism-each part has its irreplaceable role.

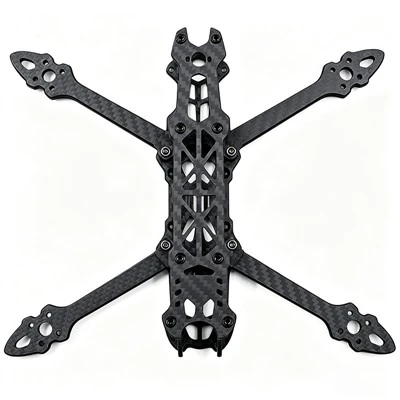
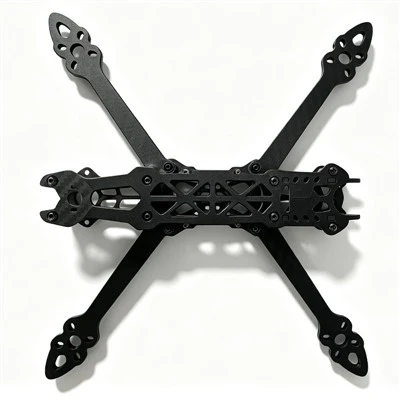
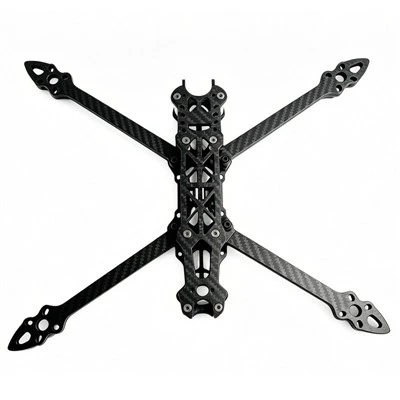
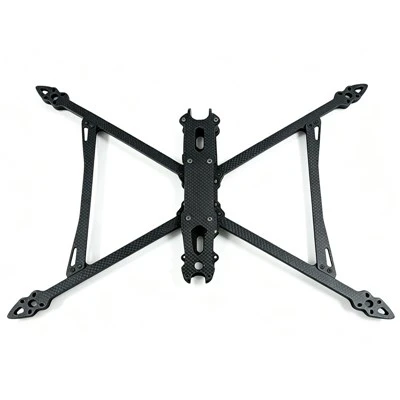
2.1 Frame -- Skeleton:
The frame is the foundation for installing all components. Over 95% of FPV frames use carbon fiber because it provides the best stiffness-to-weight ratio within an affordable price range.
Frame size is measured by propeller diameter (inches). 5 inches is the absolute mainstream standard-it is wind-resistant, can carry full-size cameras, and the entire accessory ecosystem (motors, propellers, batteries) is built around this size. Regarding arm thickness, 3mm is the standard for 5-inch racing and freestyle frames, while 4-5mm is used on heavier freestyle builds-preferring to be a few grams heavier to be crash-resistant.
Beginner advice: Choose a 5-inch frame with a good reputation, such as the TBS Source One or ImpulseRC Apex.
2.2 Flight Controller (FC) -- Brain
The flight controller is a small circuit board that reads your joystick inputs and onboard sensor data, and then decides dozens of times per second how fast each motor should spin to produce the desired action. It is the center where all other components report and receive commands.
Inside the flight controller there are:
- Gyroscope + Accelerometer: measure the current attitude and rotation rate of the drone
- Processor: running flight firmware-almost all of it is Betaflight

There are two common formats for flight control:
- Independent FC: A single board
- AIO (All-In-One): The flight controller and ESC are integrated on the same board-sacrificing a bit of repairability in exchange for a lighter and more compact airframe
Beginner advice: Choose a flight controller with an F4 or F7 processor. The F7 is about $24 more expensive than the F4, but it supports more advanced filtering functions, making it one of the best value-for-money upgrades in FPV.
2.3 Electronic Speed Controller (ESC) -- Muscle:
The ESC receives commands from the flight controller and converts them into the precise power output required for each motor. If the flight controller is the brain, the ESC is the muscle-it does not make decisions, it is only responsible for execution.
Almost all modern builds use a 4-in-1 ESC-four independent electronic speed controllers integrated on a single board, with each still independently driving its own motor. The 4-in-1 solution reduces wiring, lightens the weight, and reduces connector loosening failures.
Beginner tip:
Choose a 4-in-1 ESC with a rated current of at least 45A. The SpeedyBee F405 V4 stack kit (FC+ESC combo) is about $65, making it one of the best value-for-money options on the market currently.
The brushless motor drives the propeller to rotate. The most important parameter is the KV value-the no-load speed of the motor per volt of voltage. For example, a 980KV motor on an 11.1V battery has a no-load speed of approximately 10,878 RPM.
High KV:
Faster rotation speed, more sensitive throttle response-suitable for small propellers and compact racing drones.
Low KV:
Sacrificing top speed for torque-suitable for large propellers or heavy-duty camera gimbals.

There is no absolute good or bad: the KV value must match the propeller size and battery voltage, otherwise the motor will overheat, the flight time will be too short, or the control will feel mushy.
Beginner advice (5-inch build): 2207 or 2306 size, KV between 1700-1900 (with 4S battery) or 1700-1950 (with 6S battery). EMAX Eco II series is about $12 each, no need to feel bad if they break.
2.5 Receiver (RX) -- Nerve/Ear

The receiver is a small radio module that, after binding with your remote controller, captures your stick inputs in the air and transmits them to the flight controller-dozens to hundreds of times per second. Without it, the flight controller has no idea what your thumbs are doing.
ExpressLRS (ELRS) has become the default receiver protocol for new FPV builds. It is open-source, hardware is cheap (receivers are usually under $20), and the packet rate can reach up to 1000Hz.
Protocol matching is the place where beginners make mistakes most easily: your remote control and receiver must speak the same language-ELRS to ELRS, Crossfire to Crossfire. Protocol mismatch is the most common reason why a fresh build cannot be unlocked.
Beginner advice: Go directly for ELRS 2.4GHz. The Happymodel EP1 receiver is less than $15.
2.6 Image Transmission and Power Supply System--Senses and Blood:
Camera: Captures images.
Video Transmitter (VTX): Broadcast the video image.
Antenna: Bidirectional signal transmission.
Battery: Powers everything.
Analog vs Digital Video Transmission:
- Simulation: The latency is usually below 20ms, with almost no encoding delay; the image quality is about 480p.
- Digital (DJI O4, Walksnail, HDZero): compressed and packaged transmission, image quality 720p-1080p; latency approximately 25-40ms

Batteries are almost all LiPo (lithium polymer) because of their high discharge rate. Antennas are divided into linear polarization and circular polarization-circular polarization is the nearly universal choice for FPV because it can resist video interference caused by multipath reflections.
3. ExpressLRS (ELRS) -- The radio protocol you must know in 2026
ELRS has replaced Crossfire and FrSky ACCeSS, becoming the de facto standard for new builds. Why?
Core advantages:
- Open source: continuous community development, not dependent on a single vendor.
- Cheap: the transmitter module is less than $40, and the receiver is less than $15.
- Powerful performance: kilometer-level range, sub-millisecond latency.
- Packet rate options: 500-1000Hz for racing, 250Hz for freestyle, 50-150Hz for long range.
Two frequency bands:
- 2.4GHz: The choice for most people-small antenna, high refresh rate, and sufficient range for the vast majority of flying scenarios.
- 900MHz: Stronger penetration - suitable for true long-range and mountain flying.
The most common mistake beginners make: the firmware versions of the transmitter module and the receiver must match (for example, both are 3.3.x). Use the ExpressLRS Configurator to flash both simultaneously to ensure the versions are consistent.
Binding Phrase is the killer feature of ELRS: set the same phrase (for example, "myfirstfpv") in the transmitter module and all receivers, and they will automatically recognize and connect after powering on-no need to press the binding button, no need to plug in the binding plug.
4. Before hands-on, fly the simulator first
This is the consensus among almost all veterans: before truly unlocking a real aircraft, spend 10-20 hours in the simulator first.Why?
- Coordinating turns, throttle control, and the muscle memory to recover from bad situations are not innate-they are built through hundreds of virtual crashes, at the cost of only time.
- A $20 simulator training session is much cheaper than breaking a drone arm, burning a motor, or crashing a GoPro.
- You will make all the beginner mistakes in the simulator-and these mistakes won't burn out your flight controller.
2026 Mainstream Emulator Selection:
| Simulator | Price | Physical realism | Most suitable |
| VelociDrone | $22.99 | 9/10 (Gold Standard) | Racing, technical training |
| Liftoff | $19.99 | 8/10 | All-rounder, want to tune parameters and test build |
| Uncrashed | $16.99 | 7/10 | Flower Flying, Novice (Progressive Difficulty) |
| Tryp FPV | $19.99 | 7/10 | cinematic, exploratory flight |
| DRL Sim | $9.99 | 8/10 | DRL fan, limited budget |
Connect a real remote controller: Connect your ELRS remote controller to the computer with a USB cable-this way, the muscle memory you practice will transfer directly to the real aircraft.
5. What to buy? How to buy?
5.1: RTF (Ready-to-Fly) Kit - The most convenient
Ready to fly out of the box-includes drone, remote controller, goggles, battery, and charger. Suitable for complete beginners who want to fly immediately.
2026 Recommendations:
- BetaFPV Cetus X Kit (approx. $199) -- Can fly indoors and outdoors, comes with prop guards, and is crash-proof.
- EMAX Tinyhawk III Plus RTF (approx. $249 analog version)
The downside is: the remote controller and goggles in the kit are usually entry-level, and the entire set will need to be replaced when upgrading in the future.
5.2: BNF (Bind-and-Fly) + custom remote controller and goggles - more flexible
Only buy the drone itself, and pair the remote controller and goggles yourself. Suitable for players who have done their homework and want to get everything done in one go.
2026 Recommended Drones:
- GEPRC Cinelog35 V3 (3.5-inch cinewhoop) -- with propeller guards, can carry a GoPro, suitable for both indoor and outdoor flying
- iFlight Nazgul Evoque F6 (5-inch) -- The benchmark of freestyle flying
Recommended remote control:
- RadioMaster Pocket (approx. $80) -- King of cost-performance
- RadioMaster Boxer or TX16S ($100-200) -- all-in-one solution
Recommended goggles:
- Entry-level simulator: Eachine EV800D (about $100)
- All-in-one digital: DJI Goggles 3, Walksnail Goggles X
5.3: DIY self-assembly - the most professional
Pick the parts yourself, solder it yourself, and tune the parameters yourself. This is most recommended for those who truly want to understand FPV-because you will definitely crash, and only with a machine you assembled yourself will you know how to fix it.
2026 Recommended 5-inch Beginner Build Configuration (Approx. $280):
| Component | Recommended models | Price |
| Frame | TBS Source One V5 | $35 |
| FC+ESC stack | SpeedyBee F405 V4 50A | $70 |
| Motor (4 units) | EMAX Eco II 2207 | $60 |
| VTX | Rush Tank Solo | $35 |
| Camera | Caddx Ratel 2 | $30 |
| Receiver | Radiomaster RP1 ELRS | $15 |
| Total | ~$245 |
Don't forget the extra budget: remote control, goggles, batteries (at least 3), charger, tools (soldering iron, hex wrenches, etc.) - this "infrastructure" budget is about $200-600.
6. Final Advice for Beginners
Order is important:
Buying all the hardware before you can fly the real machine steadily means your first crash will be paid for with real carbon fiber and a real flight controller.
The correct learning order is:
simulator takeoff and landing
1
>>
turning
2
>>
hovering
3
>>
basic flower flying
4
>>
then open the shopping cart
5
Once you feel comfortable flying in the simulator, then consider which real aircraft to buy-by then, you will not only know what each part is called, but also why it is there.
FAQ
01.Should I buy a BNF or build my own?
It depends on what you want out of FPV:
| BNF (Bind-and-Fly) | DIY Build | |
|---|---|---|
| Time to fly | Fly right away | Hours to days of assembly |
| Repair ability | Unfamiliar internals | You soldered it, you know exactly how to fix it |
| Customization | Fixed configuration | Every screw to your preference |
| Best for | Those who want to fly ASAP | Those who want to truly understand the drone |
My take: If this is your first contact with FPV, buy a cheap BNF (like a 2.5-inch or 3-inch whoop) , fly it, crash it, repair it, crash it again - then build your own 5-inch. A drone you built yourself is a drone you'll always know how to fix.
02.Should I choose analog or digital goggles?
Short-term: budget. Long-term: your path.
- If your **total budget is under $600**, go analog. Analog goggles are cheap ($100-$200 gets you solid ones), and the whole analog video system is more economical.
- If your **budget is $800+**, go digital right away. DJI Goggles 3 or Walksnail Goggles X are expensive ($400-$600), but the image quality jump is transformational - once you see digital, it's hard to go back.
- Important: Analog and digital video systems are not compatible. If you choose digital goggles, you must pair them with a digital VTX and camera.
Beginner compromise: Buy an analog goggle with HDMI input (like Eachine EV800D). That way, when you upgrade to digital later, the goggles can still serve as a big-screen monitor.
03.What size drone should I buy? Is 5-inch too big?
5-inch is the gold standard of FPV - wind-resistant, solid feel, richest parts ecosystem. But for a beginner, 5-inch isn't necessarily the best starting point.
| Size | Best For | Beginner Friendliness |
|---|---|---|
| 2.5-inch (Whoop) | Indoors, small parks, learning basics | ★★★★★ Unbreakable, fly anywhere |
| 3.5-inch (Cinewhoop) | Indoor/outdoor mix, light cinematic | ★★★★☆ More power than 2.5, still ducted |
| 5-inch (Open Prop) | Parks, freestyle, racing | ★★★☆☆ Best feel, but most dangerous |
My strong advice: Make your first drone a 2.5-inch or 3-inch Cinewhoop (ducted/prop-guarded) . It won't cut you or others. It's light so it won't break. It's cheap so you won't cry. Get comfortable in the sim and on the small drone, then go 5-inch.
04.How long does a battery last? How many should I buy?
Per-battery flight time:
- 2.5-inch whoop: 3-5 minutes
- 3.5-inch cinewhoop: 4-7 minutes
- 5-inch freestyle: 3-6 minutes (aggressive) to 8-10 minutes (cruising)
FPV flight times are just this short - you're trading capacity for discharge rate to get responsive power, not endurance.
How many? At least 4-6. One flying, one cooling, one charging, one spare. Fly 5 minutes, charge 30 minutes - without 4 batteries, you'll spend most of your field time waiting.
Beginner's fatal mistake: Flying the battery below 3.3V per cell (over-discharge). Always land at 3.5V per cell. A battery is $20-$40 - over-discharge it once and it's dead.
05.Should I choose 2.4GHz or 900MHz for ELRS?
Unless you're flying long-range (over 5km/3 miles), choose 2.4GHz.
| 2.4GHz | 900MHz | |
|---|---|---|
| Antenna size | Small, easy to mount | Large, awkward to mount |
| Packet rate | Up to 1000Hz | ~200Hz max |
| Penetration/Range | Good enough (2-5km) | Extreme (10-50km) |
| Best for | Racing, freestyle, 99% of pilots | Long-range, mountain surfing |
Most pilots will never push the limits of 900MHz. 2.4GHz ELRS easily gets 2-3km in open areas - that's farther than 99% of people will ever fly.
06.What protocol should my radio use? Does it have to match the receiver?
Yes, it must match. Protocol mismatch is the #1 reason a fresh build won't arm.
- If your receiver is ELRS, your radio must have an ELRS transmitter module (built-in or external).
- If you use a Crossfire receiver, your radio must have a Crossfire module.
- Same for FrSky, FlySky, and other older protocols.
Simplest choice: Buy a radio with built-in ELRS - RadioMaster Pocket ($80), Boxer ($120), or TX16S ($200). Then buy ELRS receivers for everything. You'll never have a protocol mismatch.